
Develop a new site for IANZ Agent
Getting Started
Before you get started, please ensure you have the following ready to go:
- Completed Content Gathering Form including any images provided by the agent.
- Logo files, brand colours and any branding guidelines (if applicable).
- Access to staging website setup for the new IANZ agent. This will be a clone of IANZ Design 1.
Setup Staging Site: For assistance on setting up a new staging environment, please refer to this checklist.
Settings
Login to the backend of the staging site setup for the new IANZ Agent and navigate to Settings in the left hand menu. Here you need to do the following:
- Site Title: update the site title to something appropriate for the client.
- Timezone: check the timezone has been set correctly. IANZ agents are based in New Zealand.
Tip: Leave the Administration Email Address set to [email protected] during development. This email address will be updated at launch.
Launchpad Site Settings
Under Launchpad -> Site Settings configure the various site options.
- General tab: upload favicon, Site Logo, Site Alternative Logo and Social Sharing Image.
- Colors tab: set the Brand, Button and Typography colours
- Header tab: for Header Background Color decide if we use Header Transparent or switch to a solid color. This all depends on logo and how this looks but for most IANZ sites we use Default or Dark Header.
- Pages tab: adjust the default Header / Banner Image, Login Page Background Image and 404 Page Banner Image to be more relevant to the client.
- Contact Information tab: adjust the Phone Number, Email Address and Social Media Links.
- Footer tab: under Copyright Message add client’s name after the copyright year.
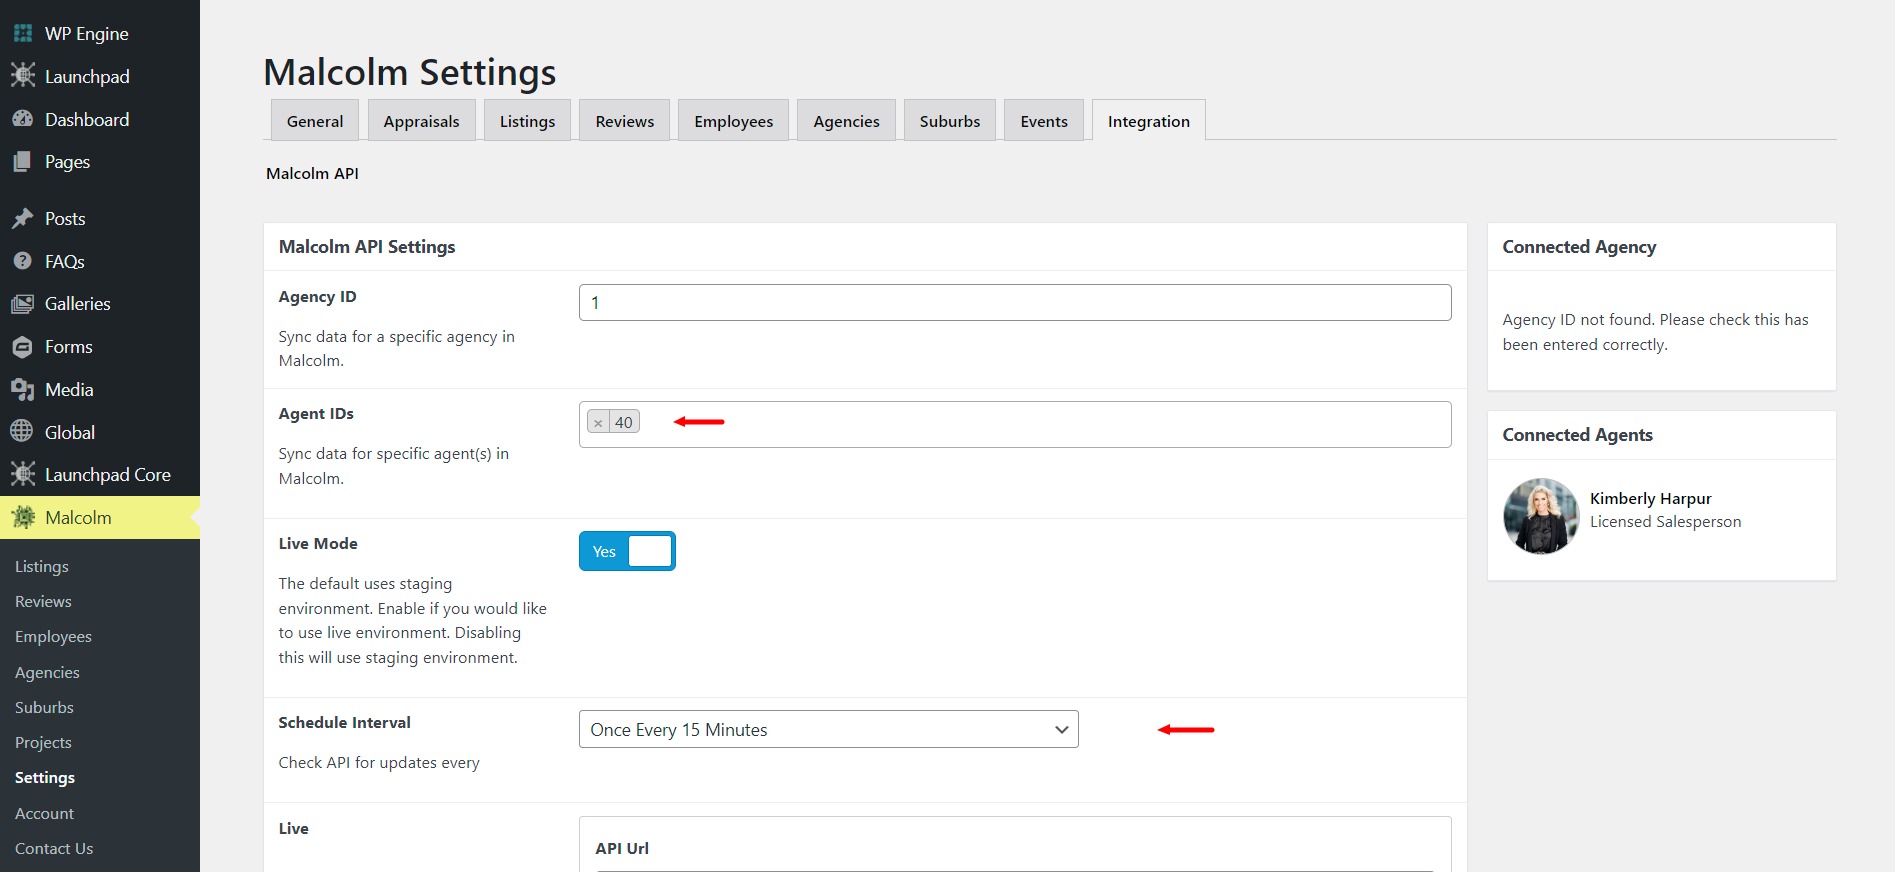
Malcolm Settings
Under Malcolm -> Settings go to the Integration tab and enter the Malcolm Agent ID for the new agent in the field provided. To find this ID, we need to query the IANZ Malcolm API or ask Dboy, Marc or Seth.
See screenshots
Global Elements
Under Global -> Elements we need to update content in the elements listed below.
- Call to Action: adjust element background image to be more suitable to the client.
- Contact Form and Map: adjust Google iframe code to be more relevant to the client.
- About and Contact Form: adjust the image and content.
Pages
Under Pages we need to update some content and remove any pages not required for this project.
- Home Page: adjust the hero banner message and background image to be more suitable to the client. For the Property Search Form, adjust the shortcode if the agent does not offer Rental Listings. Update the content in the main text editor to the agent’s about content. In the About Element, adjust the Content Box title and image.
- About Page: update the content in the main text editor to the agent’s about content. Use the More tag to display a Read More link if the client has provided lots of content. In the About Element, adjust the Content Box title and image.
Draft unused pages: if the agent does not offer Rental Listings, draft the Rental Appraisal pages and Recently Leased.
Posts
Under Posts we may have a few tests posts which should either be repurposed or removed if not required.
Reviews
If the client has provided testimonials or reviews, we add these under Malcolm -> Reviews. Select Add New and repeat the steps below for each review:
- Add Title: enter the name of the person who provided the review. The title is not displayed on the website.
- Description: in the main text editor enter the review description provided.
- Reviewer Name: scroll down to the Review Details fields where you will find a field for Reviewer Name. Enter the reviewer name here.
- Reviewer Role: this field is not required however if the client has provided this information enter it here. Some examples include Buyer, Seller, Investor.
- Review URL: this field is not required however if the client has provided a link to a third party website where the review can be verified, enter the URL here. Please note, if you enter a URL in this field you should enter a value in the Source field further up. This field accepts manual, rea, rma or google. Enter only one value.
- Reviewed On: this is a required field and the date entered is important for ordering purposes. By default, reviews displayed on the website are ordered by this date with the latest showing first.
Tip: if the client has provided 10+ reviews, only enter the latest 10 reviews and then we instruct the client to add the rest.
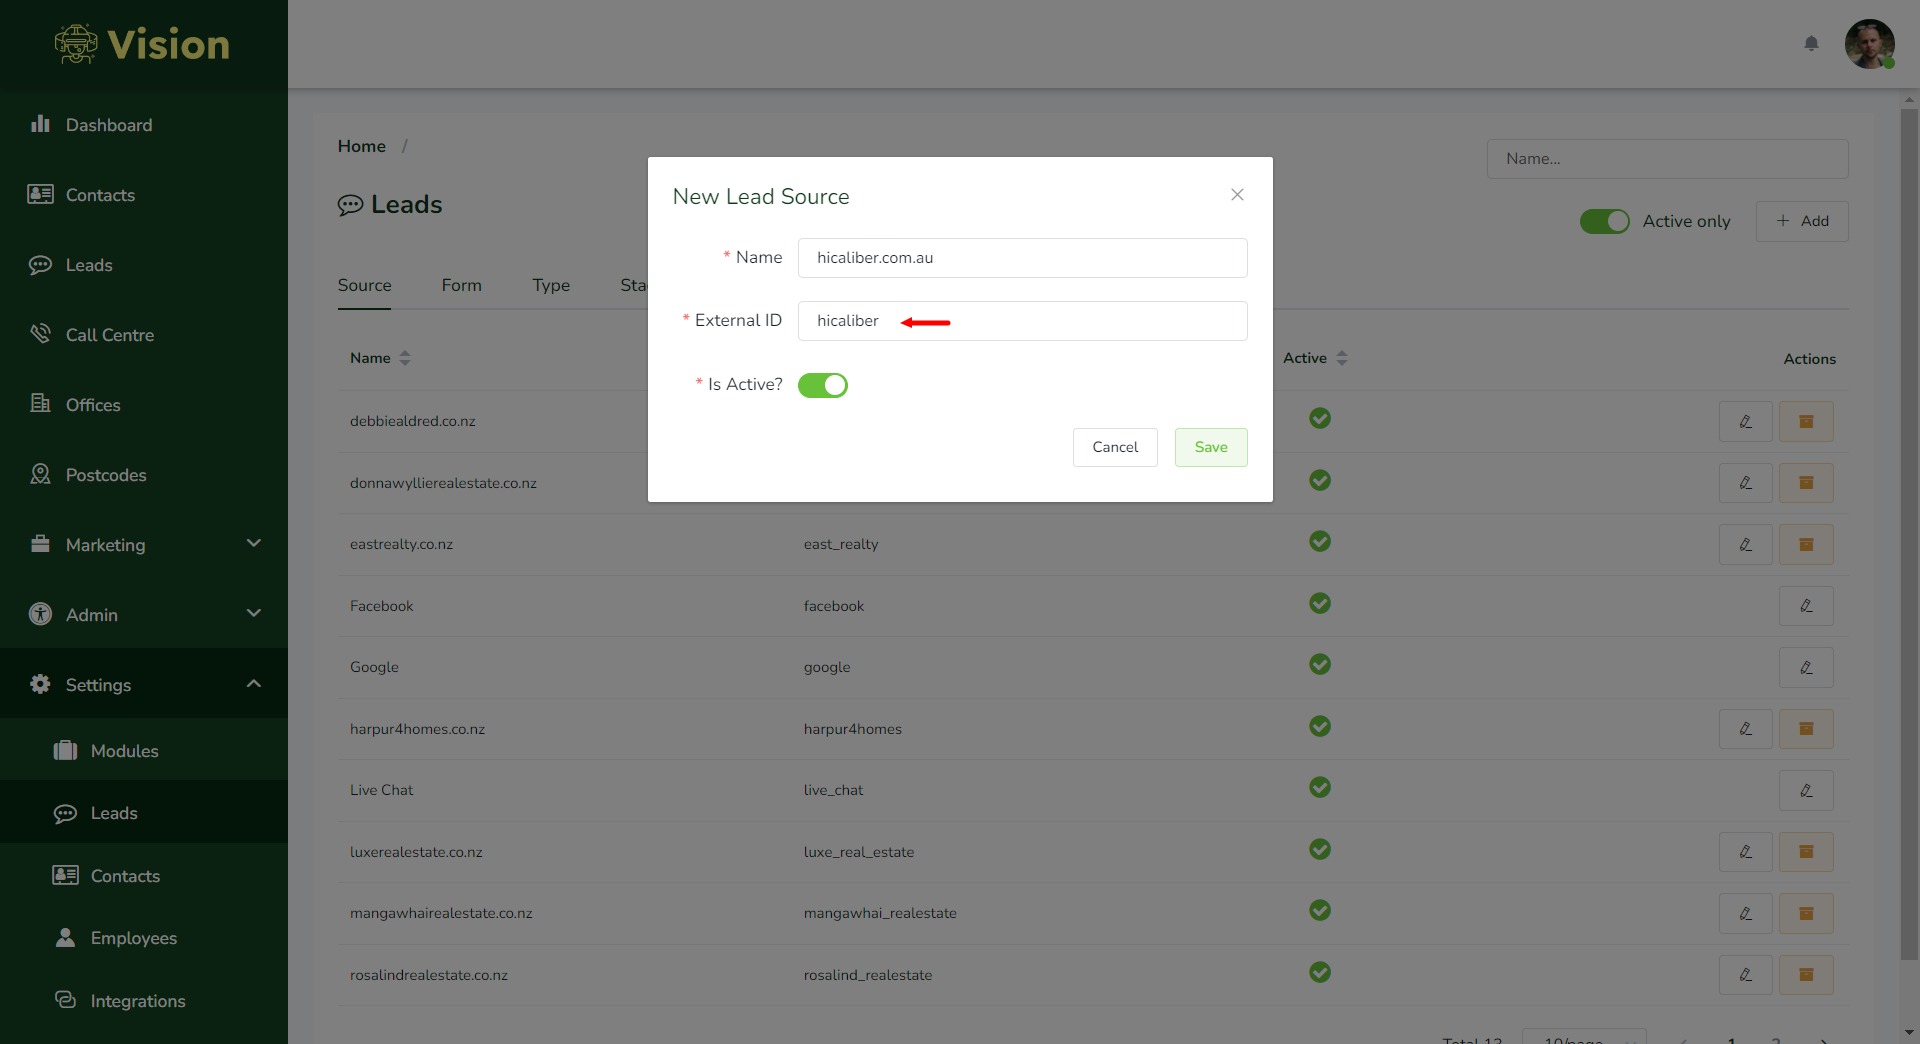
Vision Software
Our Vision Software for IANZ receives form submissions (e.g. Property Enquiries) from the agent websites. We need to do some basic configuration for the forms to feed through successfully. Please follow the steps below:
- Vision Software: login to IANZ’s version of Vision and under Settings -> Leads we need to add a unique Source to be used by the new agent website for passing leads. Follow the structure of the other agent sites. Copy the External ID value as this needs to be added to the backend of the agent’s website.
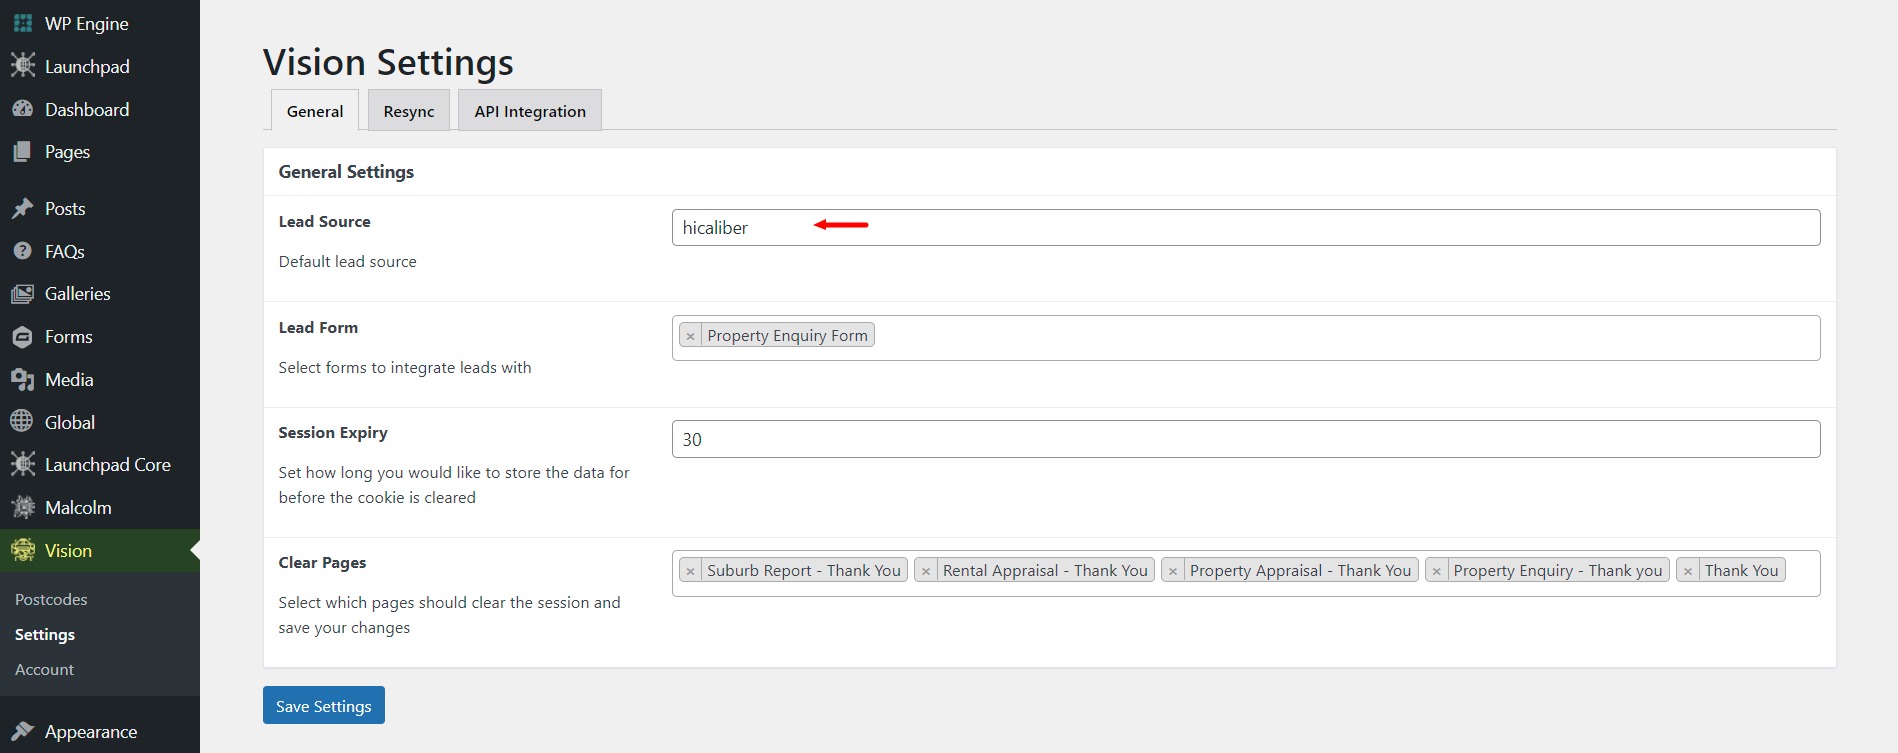
- Vision Settings: in the backend of the agent’s website go to
Vision -> Settingswhere there is an option to enter a Lead Source value. Here you need to enter the External ID value used by software.
Tip: Check that all Thank You pages are displayed in the Clear Pages field. This field controls which pages clear UTM tracking codes following form submission.